This blog post is going to cover how to set up TLS secured client channels when using one of our command line tools, such as QLOAD, Q or MQSCX, to connect to your queue managers. Before I start, I just want to say up front that there is nothing special about how you do this. Our tools are all ‘C’ language MQI applications and so setting up TLS for them is just the same as setting it up for the IBM supplied ‘C’ language sample amqsputc as an example. If you know how to do that, then you know how to set it up for our command line tools.
If you want similar instructions for our GUI tools MO71 and MQEdit, please see this post.
Certificates
In order to have TLS secured connectivity between your MQGem tool and your queue manager, your queue manager must have a certificate, hopefully not a self-signed certificate; and you, the MQGem tool user, must also have a certificate identifying you. It is likely that this certificate identifying you will be used for connectivity from various different tools, so it does not need to be specific to the tool you are using. This blog post is not going to cover setting up the queue manager certificate as that has been amply covered in IBM Docs. What you need at your machine where you are running an MQGem tool is a signed certificate identifying you, and a copy of the CA certificate that signed the queue manager’s certificate. It is possible that you have several of the latter item depending on how your queue managers are setup. One hopes that you have many less of these than the number of queue managers you need to manage.
Key Database File
MQGem tools are ‘C’ language MQI applications. This means that the IBM MQ Client code expects it to use a KDB file with a matching named stashed file. Unlike Java programs, you do not provide the password to the certificate store (KDB file) anywhere, the IBM MQ Client code finds the stash file that contains the password due to the fact that it has the same name as the KDB file. Here is my set of files:-
 Directory of C:\MQGem

06/07/2021  16:43                88 MQGemClient.crl
06/07/2021  16:43            20,088 MQGemClient.kdb
06/07/2021  16:43                88 MQGemClient.rdb
06/07/2021  16:43               193 MQGemClient.sth
               4 File(s)         20,457 bytes
Later you will see when setting up your certificate configuration that you use the name up to, but not including, the file extension. The IBM MQ Client code can construct the name of the key repository and password stash file by appending the “.kdb” and “.sth” file extensions respectively.
As you follow the instructions in this blog post, you are going to create a number of files, the above KDB and associated ancillary files, a CCDT and an mqclient.ini file. It is useful to first create a directory to keep all these files together.
If you don’t already have a KDB file supplied for your use, you should create one now. Click on the twisty to see the details for each step that you need to do.
Step 1: Create a KDB file
IBM MQ supplies tools for you to create the files you need. In this case we show examples of using the command line tool runmqakm. There is also a GUI tool that can do the same job. Here is the command to create your KDB file. In my example, the KDB file (and accompanying stash file etc) will be created in the C:\MQGem directory, using names MQGemClient.* – you may wish to change this. In addition, you probably want a stronger password too!
runmqakm -keydb -create -db C:\MQGem\MQGemClient.kdb -pw passw0rd -type cms -stash
If you want, you can use the runmqakm tool to create a password for you:-
runmqakm -random -create -length 16 -strong
The KDB file, once created, is the place to put the various certificates you need. As mentioned above, you’ll need to have the CA certificate that signed your queue manager(s) certificates. This is so that the certificates coming from the queue managers at connection time can be validated by the IBM MQ Client as part of the TLS handshake.
If you have one or more files containing the CA certs to allow you to validate connections to your queue manager(s), add them to your KDB now. If you only have a single certificate file (a PKCS#12 file) that also contains the CA certs, skip Step 2.
Step 2: Add CA certificates to KDB
Here is the command to add a CA certificate to your KDB. As before, you are likely using a different location in your file system for the KDB file. Note that I am using the -stashed parameter from now on, so I never have to type in the password again. The label you use when you add a CA certificate doesn’t matter. Just make it something that is helpful in remembering what this certificate is. In my example MQGemProdCA is the label I have used for the production environment CA certificate.
runmqakm -cert -add -db C:\MQGem\MQGemClient.kdb -stashed -label MQGemProdCA -file MQGemProdCA.arm -format ascii -trust enable
Finally you need to have a certificate identifying you, the user of an MQGem tool. You may have been given a file already containing your signed certificate, and have to add that to your KDB, or you may need to generate a certificate request, get it signed by your company CA, and then when you get it back, receive it into the same KDB where you created the request. Choose either Step 3a or 3b below depending on how your company does this.
DO THIS: Step 3a: Add PKCS#12 private certificate into KDB
This special certificate file type is one that contains both your certificate and the private key for the certificate. It is very important to keep the private key safe, so when transporting this around in a PKCS#12 file, this particular type of file has a password. Other files that only contain certificates without private keys don’t have passwords.
Here is the command to add a PKCS#12 certificate file to your KDB. This command will also add the CA certificates that are in the file. Note that I am using the -stashed parameter for the KDB password, so I never have to type in the password again. The password on this command is the one that goes with the PKCS#12 file you have been given.
runmqakm -cert -import -file MoragCertificate.p12 -type pkcs12 -pw pkcs12passw0rd -target c:\MQGem\MQGemClient.kdb -stashed
OR THIS: Step 3b: Create a Certificate Request
To make a certificate request, issue the following command, using the KDB file that you just created.
runmqakm -certreq -create -db C:\MQGem\MQGemClient.kdb -stashed -label MQAdminProd -dn "CN=Morag Hughson,OU=Prod,O=MQGem Software" -file Clnt_Prod_Request.csr
Now send the certificate request file off to the CA that signs certificates for your environment. When you receive the signed certificate file back from them, receive it into the same KDB as before with the following command.
runmqakm -cert -receive -db C:\MQGem\MQGemClient.kdb -stashed -file Clnt_Prod_Signed.arm
As a final check that everything got added ok, list the contents of your KDB with the following command.
runmqakm -cert -list all -db C:\MQGem\MQGemClient.kdb -stashed
You should see output something like this. There should be at least one trusted certificate (shown with a !) and at least one personal certificate (shown with a -). You will need the label of the personal certificate when you come to set up your certificate configuration in a moment, so remember that.
5724-H72 (C) Copyright IBM Corp. 1994, 2020.
Certificates found
* default, - personal, ! trusted, # secret key
!       MQGemProdCA
-       MQAdminProd
Client-connection Channel
MQGem command line tools generally rely on the use of a Client Channel Definition Table (CCDT) to provide the client-connection channel definition details, rather than having lots of command line parameters to cover all the possible attributes. Use of a CCDT also makes it simpler to use the same channel definition details across a range of tools instead of having to specify the attributes individually for use with each tool. It is therefore a highly recommended method. If you don’t already have a CCDT with your client-connection channel details you should create one now.
Step 4: Create TLS-secured CLNTCONN channel in CCDT
In modern versions of IBM MQ, the CCDT can be created on the client machine using either
runmqsc or our
MQSCX tool, starting the tool with the
-n flag to indicate you wish to create a CCDT.
Both runmqsc and MQSCX will pay attention to the MQCHLLIB and MQCHLTAB environment variables to determine the location where the CCDT file will be written. Additionally, MQSCX has a -t flag that you can use to specify the full path and file name you want instead.
If you want to use a JSON CCDT, MQSCX can be used to create one of those by using the -t flag. See Working with JSON CCDT files blog post for more details.
Once your MQSC tool of choice is running in CCDT mode, create the channel with a command like the following.
Your company may choose to use a different CipherSpec (the SSLCIPH) parameter. I have chosen to use the more recently introduced ANY_TLS12. If you can’t use one of the “ANY” values then you should ensure that the same value is used here, and in the SVRCONN channel (next step).
DEFINE CHANNEL(MQGEM.SVRCONN.TLS) CHLTYPE(CLNTCONN) TRPTYPE(TCP) CONNAME('GEMWIN3.mqgem.com(1701)') SSLCIPH(ANY_TLS12) QMNAME(MQG1)
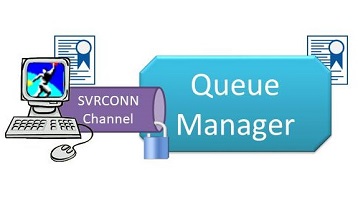
Server-connection Channel
You’re also going to need to create a TLS-secured server-connection (SVRCONN) channel on the queue manager if you don’t already have one in place.
Step 5: Create TLS-secured SVRCONN channel
Here’s an example MQSC command to define such a channel. The name you use for your channel may well be different. Whatever it is, remember it for the next step.
Your company may choose to use a different CipherSpec (the SSLCIPH) parameter. I have chosen to use the more recently introduced ANY_TLS12. If you can’t use one of the “ANY” values then you should ensure that the same value is used here, and in the CLNTCONN channel (previous step).
DEFINE CHANNEL(MQGEM.SVRCONN.TLS) CHLTYPE(SVRCONN) TRPTYPE(TCP) SSLCIPH(ANY_TLS12) SSLCAUTH(REQUIRED)
mqclient.ini configuration
When setting things up outside of the MQGem tool itself, you can either use environment variables or the mqclient.ini file to point to all the various settings. We’ll be showing you the latter today. If you’re not familiar with why the mqclient.ini file is our recommendation, you might find this blog post interesting.
Step 6: Create mqclient.ini file
In your working directory where you have your KDB and CCDT files, create a text file with the name
mqclient.ini. Edit this file to add the following contents.
Note the ‘.’ to mean “this directory” in the value for the ChannelDefinitionDirectory. Alternatively you can fully spell out your directory.
CHANNELS:
  ChannelDefinitionDirectory=.
  ChannelDefinitionFile=MQGEM.TAB
SSL:
  SSLKeyRepository=C:\MQGem\MQGemClient
  CertificateLabel=MQAdminProd
Test Connectivity
Now that you have your certificates set up, your client channel definition created, and your mqclient.ini file pulling all the information together, you can run your command line MQGem tool to pick up and use all these things you have configured.
The easiest way to do so is to ensure you are in the directory containing the mqclient.ini file before you run the command invocation. The IBM MQ client will pick up the mqclient.ini that is in the current directory by preference. However, if you want to do something different, this page shows all the different mechanisms.
Step 7: Run Q using TLS connection
From in your directory containing the
mqclient.ini file, invoke Q with a command like the following.
The -l mqic flag tells Q to make a client connection rather than a locally bound connection, and the rest of the invocation is up to you. In our example we are just opening queue Q1 for output.
q -m MQG1 -l mqic -o Q1
Step 7: Run QLOAD using TLS connection
From in your directory containing the
mqclient.ini file, invoke QLOAD with a command like the following.
The -l mqic flag tells QLOAD to make a client connection rather than a locally bound connection, and the rest of the invocation is up to you. In our example we are just browsing queue Q1 to a file.
qload -m MQG1 -l mqic -i Q1 -f q1.qld
Step 7: Run MQSCX using TLS connection
From in your directory containing the
mqclient.ini file, invoke QLOAD with a command like the following.
The -l flag tells MQSCX to make a client connection rather than a locally bound connection.
mqscx -m MQG1 -l
If you receive an error when trying to connect, remember to use the client error log, found in <MQ_DATA_PATH>/errors/AMQERR01.LOG. Scroll to the bottom for the most recent error.
Summary
It is hoped that this post will help you set up TLS-secured connectivity between MQGem command line tools and your queue manager. Remember that the same KDB file and certificates will also work with the IBM-supplied samples such as amqsputc. If you have any issues, it may be helpful to try things out with that very simple sample first. It is also good advice if you get validation problems to change the SVRCONN channel to use SSLCAUTH(OPTIONAL) and get it working that way first. Once it does then go back to SSLCAUTH(REQUIRED) knowing that the problem is that you are either not sending, or the queue manager is not validating, the client side certificate.
If you have IBM MQ V9.3.0 (or later) as your client installation you can also now make use of a new feature in that release which allows you to avoid having a stash file. See this post for more details.
If you have situations where you are trying to set up TLS-secured connectivity for MQGem tools that are not covered in this post, please do get in touch, either in a comment below, or through any of the usual channels (see About page).


 In other words you can repeat the


 The IBM MQ


